

Samples from Irene
Today I decided to dig into a project I have been thinking of for over a year. It is a crochet covered wire hanger. I have several of them in my closet and have given others away in the past. I purchased them at the local thrift store and at an auction sale of one of our parishioners. Irene made many of them and I bought them in her honor. I have wanted to make them to honor her more. I have an entire laundry soap pail of wire hangers that could be used for this project, so no shortage of working on these. I took a few pictures, but not enough to explain the exact how to’s. I found a couple of places with good explanations and have posted them here: http://craftknowitall.blogspot.com/2013/01/crochet-cover-your-wire-hangers.html and the other one, which is a video is found at this site, but I don’t understand why it doesn’t show up in blue. https://www.youtube.com/watch?v=4q6AOTU2-4c by Sandy Shockley
 I considered using the idea to tape the wires together and start at the hook, but then was too lazy to go down the steps for the tape, and convinced myself that if I ever wanted to wash them, I wouldn’t want the tape in it. So, I started by winding the yarn around the top of the hook tightly a few times then making a loop and beginning to crochet in a single crochet stitch taking the first loop under the wire and the second over and then pulling both through the loop on the hook. I won’t try to make this sound like a wonderful easy craft. The hangers are awkward to hold and the stitch is tough at best. The only redeeming factor is that even though it isn’t easy, it doesn’t take long to complete and it would be a great way to use up scraps of yarn.
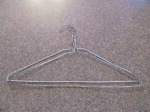
Chosen wires

Final project!!
Before I began, I spent some time choosing a couple of hangers that matched. I ended up grabbing a pliers and doing a bit of bending to get the little hook on the neck tight to the neck wire. They were not a perfect match, but as close as I could find. I think that might be part of the difficulty, finding two hangers that match. I do recommend using two hangers rather than just one for this project. One of the sample instructions that I shared suggests using two strands of yarn, and I feel that might be hard to manipulate, though maybe it was that I was using too small of a hook. I used a size G.

Roger about to nap!
In terms of frugal living, this is a perfect project. It saves wire hangers from being tossed in the garbage and turns them into very useful hangers. I like these much better than plastic because there are no sharp edges that can snag a delicate garment. Also the yarn holds your garment in place and prevents it from falling off the hanger. Besides that it is a good way to use up extra yarn. These are tough to make, but actually a fairly quick craft and a nice extra little gift to throw into a gift basket at Christmas or birthday or some other time. I did have a little help while crocheting. Roger sat tight against me and held the yarn until she fell asleep. I guess she needed attention.
Hope you enjoyed the frugal project idea. I guess it could also count in de-cluttering because it gives you a place for all those wire hangers you want to toss out.

Jan 12, 2017 @ 23:09:37
I used to crochet, and I remember making sets of these for friends as Christmas gifts when I was in high school! Such a great idea – makes me want to go out and get crocheting supplies again!
LikeLike